


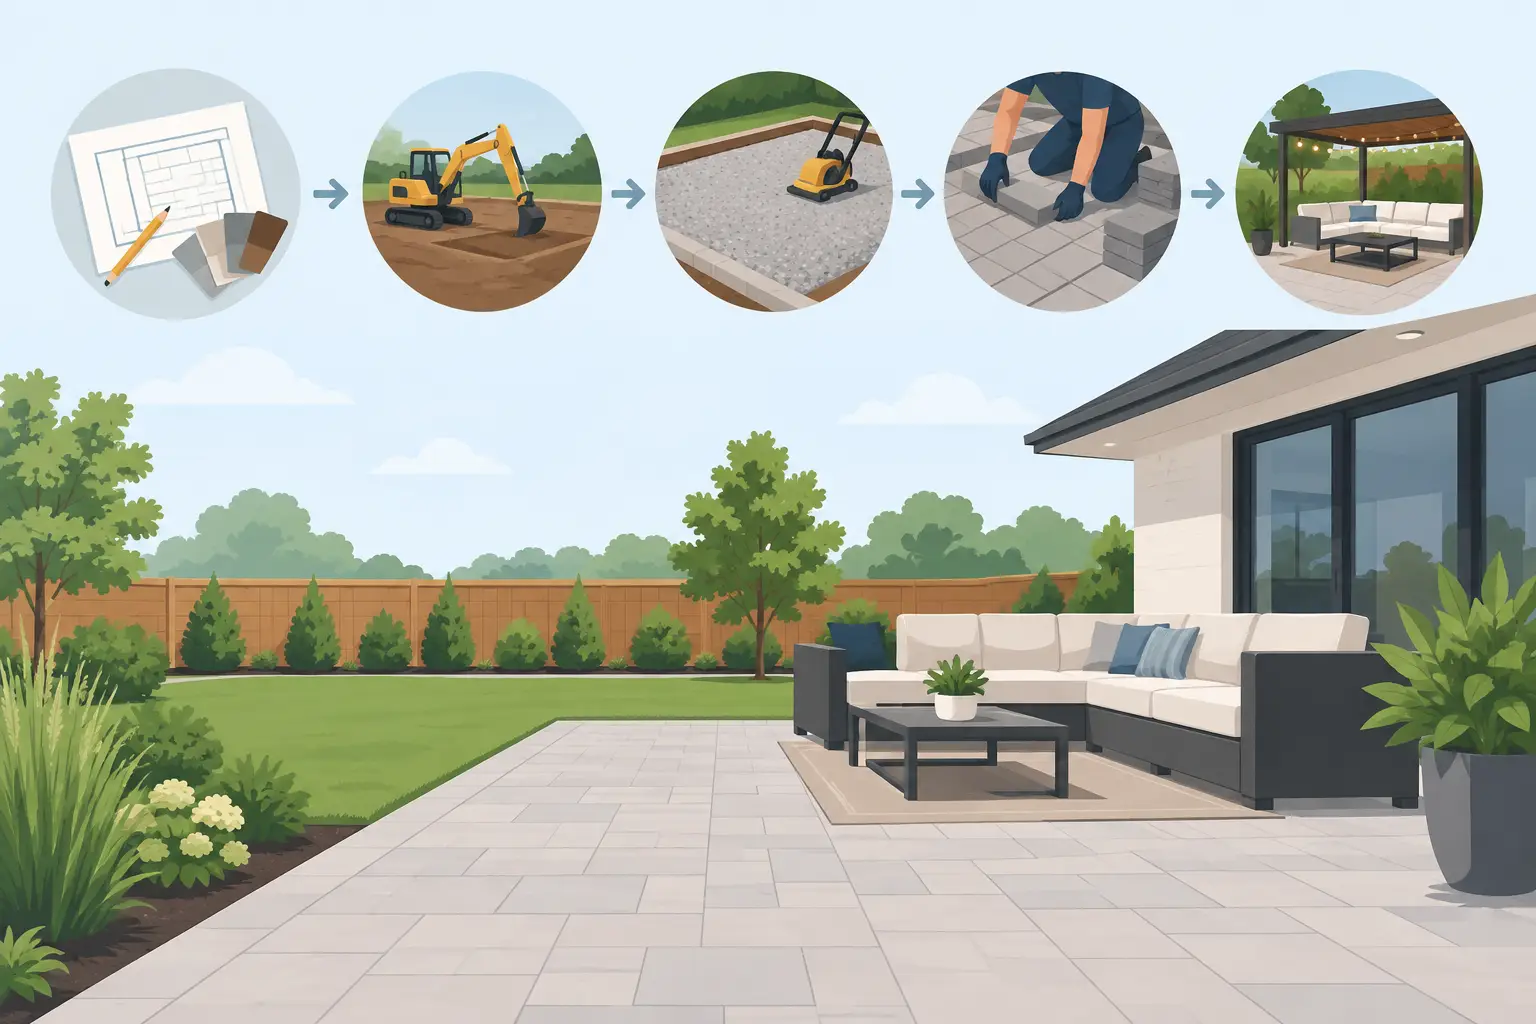
18 Sep Your Patio Installation Timeline, Step by Step
A patio is often the feature that turns a yard into a true outdoor living space – a setting for relaxed mornings, family dinners, and evenings with friends. A realistic patio installation timeline helps protect that vision. It sets clear expectations for design decisions, material ordering, site preparation, and the craftsmanship required to build a surface that looks exceptional and performs for years.
For most custom residential patios, the work on-site may take one to three weeks. The full process, from the first conversation through final installation, typically takes several weeks and can take longer when a project includes detailed design, permits, retaining walls, drainage improvements, lighting, planting, or a larger outdoor kitchen. The right timeline is not simply the fastest one. It is the one that gives every stage the attention it deserves.
What Shapes a Patio Installation Timeline?
No two properties in the Greater Toronto Area have the same conditions. A straightforward paver patio on a level, accessible yard moves differently than a terraced natural-stone entertaining area built around a pool, pergola, or mature trees. Scope matters, but so do the decisions made before crews arrive.
Material selection is one major factor. Popular pavers, porcelain slabs, and natural stone may need to be reserved or ordered in advance, especially during the busy spring and summer construction season. Custom-cut stone, specialty borders, fire features, and built-in elements can extend lead times, but they also create the tailored finish that makes a patio feel integrated with the home rather than added as an afterthought.
Site access also affects the schedule. A backyard reached through a narrow side gate requires a different installation approach than one with open equipment access. Existing decks, fencing, trees, utility lines, grade changes, and buried drainage all deserve review before construction begins. Identifying these realities early prevents costly changes once the project is underway.
Weather has a role as well. Light rain does not always stop landscape work, but sustained rain can saturate subgrade soils, delay excavation, and compromise the compaction needed beneath a patio. Freezing conditions create additional limitations. Experienced planning accounts for seasonal conditions without treating them as an excuse to rush critical preparation.
The Patio Installation Timeline, From Vision to Completion
1. Consultation and site review
The first phase is where an outdoor space begins to take shape. A professional consultation considers how the patio will be used, who will use it, and how it should relate to the architecture of the home and the rest of the landscape. Entertaining, grilling, dining, poolside lounging, privacy, sun exposure, and circulation all influence the layout.
This stage commonly takes one to two weeks, depending on scheduling and the project’s complexity. It is also the best time to discuss budget priorities. A larger patio is not automatically a better patio. A well-proportioned space with thoughtful transitions, durable materials, and room for the way you live can deliver more value than square footage alone.
2. Design, selections, and approvals
For a custom project, design should resolve the details before construction starts. This can include patio dimensions, elevations, drainage direction, material patterns, coping, steps, walls, planting areas, and connections to doors, driveways, or existing structures. The goal is a cohesive environment where function and natural beauty support one another.
Allow roughly two to six weeks for design refinement and material selection. Homeowners can keep this phase moving by making timely decisions on surface materials, colors, features, and any changes that affect the layout. It is worth taking the time to review these elements carefully. Changes on paper are simple; changes after excavation has begun are not.
Some projects require permits, utility locates, condominium approvals, or municipal review. Requirements vary by location and by the work involved. A ground-level patio may not need a building permit, while associated structures, drainage changes, electrical work, or features such as a pergola can introduce additional approvals. This step can add several weeks, so it should be addressed early rather than treated as a last-minute task.
3. Scheduling and material preparation
Once the plan is finalized, the contractor schedules labor, deliveries, and equipment around the agreed scope. This period may be brief for readily available materials, or it may take several weeks when specialty products are involved. During peak season, a well-established landscape firm may be booking projects in advance, particularly for larger design-build work.
Homeowners can prepare by clearing patio furniture and personal items from the work area, confirming access arrangements, and discussing protection for pets, children, and nearby garden areas. Construction is active by nature, but a clear plan for access and staging keeps the site safer and more organized.
4. Excavation and base construction
This is the stage that determines whether a patio will remain level, drain properly, and withstand changing weather. The visible pavers or stone are only one part of the finished system. Beneath them is a carefully prepared foundation designed for the site and material.
Excavation removes soil to the required depth, accounting for the base, bedding layer, and finished patio height. Crews then install and compact aggregate in controlled lifts. Proper grading directs water away from the home and avoids low spots that collect water. Depending on the size of the patio, access, soil conditions, and drainage requirements, this phase often takes two to five days.
It may appear that progress is slow during excavation and compaction, but this is where quality in craft matters most. A beautiful surface installed over an inadequate base can settle, shift, or hold water. A patio built with disciplined preparation has the structural foundation to maintain its appearance and function over time.
5. Surface installation and finishing details
Once the base is ready, the patio surface is set according to the approved pattern and layout. Pavers, porcelain, or natural stone are installed with close attention to alignment, cuts, joints, and edge restraint. Curves, inlays, borders, steps, and changes in elevation require additional precision and can lengthen this stage.
A simple patio surface may be completed in two to four days. More detailed projects can take a week or longer, particularly when they include retaining walls, seat walls, fireplaces, outdoor kitchens, lighting, or integrated planting beds. The finishing work is what gives a custom patio its polished character: clean edges, balanced lines, intentional transitions, and a result that belongs to the property.
6. Final review and settling into the space
At completion, the site is cleaned, work areas are restored, and the finished patio is reviewed. This is the time to understand any material-specific care recommendations and to confirm that drainage, transitions, and installed features meet the intended design.
Many patios can be used soon after installation, although certain elements may have their own curing or commissioning requirements. If polymeric joint sand or masonry work is part of the project, follow the contractor’s guidance before moving heavy furniture into place or washing the surface.
How Long Does Installation Take On-Site?
For planning purposes, these ranges are useful, but they are not guarantees. A compact, uncomplicated patio may take three to five working days after materials are on-site. A medium custom patio commonly takes one to two weeks. A complete outdoor living environment with multiple structures, lighting, stonework, planting, and drainage can take several weeks of on-site work.
Four conditions most often affect the schedule after work begins:
- Weather that prevents excavation, compaction, or safe installation.
- Unforeseen site conditions, such as buried debris, poor soil, or unmarked obstacles.
- Scope changes requested after construction has started.
- Additional trades or inspections tied to electrical, gas, structures, or pool-related work.
These variables are not always avoidable, but they are manageable with clear communication and a detailed plan. The most reliable contractors explain what they find, outline the impact, and recommend the appropriate solution rather than concealing a problem beneath the finished surface.
Planning for the Right Season
Spring through fall is the primary patio construction season in the GTA, and early planning creates more flexibility in scheduling. Homeowners hoping to enjoy a patio for summer gatherings should ideally begin design conversations in late winter or early spring. That allows time for design, product availability, approvals, and construction without forcing decisions under deadline pressure.
Fall can also be an excellent time to install a patio. Temperatures are often favorable for construction, and completing hardscape work before winter can position the property for planting and outdoor use the following spring. The best start date depends on project scope, materials, and site conditions, not just the date on the calendar.
A custom patio should feel effortless once it is finished, but the result comes from deliberate work below and above the surface. With a clear plan, realistic schedule, and a team committed to details, your patio can become the lasting center of an outdoor space that reflects how you want to live. Redleaf Landscape Inc. has proudly brought that standard of custom design and installation to GTA properties since 1986.